Mont-Saint-Michel Photography Guide: Best Spots & Timing
Best Spots, Timing & Camera Tips

The best photography at Mont-Saint-Michel requires three things: the right viewpoint (the footbridge dam and the south rampart circuit are most accessible; Roche Torin and Grouin du Sud offer the dramatic distance shots), the right tide (high tide on a coefficient above 100 for the water-surrounded island; low tide for reflections in tidal pools), and the right light (golden hour before sunset or at sunrise, when the bay mist gives the early morning shot its magic). Night photography from the footbridge dam with a tripod, after 21:30 when the illumination is fully active, produces the most distinctive images.
Mont-Saint-Michel is one of the most photographed sites in France for a reason — the combination of medieval architecture, tidal landscape, and dramatic light creates conditions that reward photographers of all levels. But the most famous images require planning: knowing when the tide is right, where to stand, and when the crowds will not be in your frame.
This guide covers every viewpoint worth knowing — from close-range reflection shots at the footbridge dam to telephoto compositions from Roche Torin 8km away — along with the tidal timing, seasonal light, and equipment choices that make the difference between a snapshot and a photograph.
Understanding the Light
Sunrise and early morning is the premium photography window at Mont-Saint-Michel. From approximately 45 minutes before sunrise, the bay fills with a low mist that diffuses the light and creates the hazy, romantic quality seen in the most iconic images of the site. This mist is most common in late summer (August–September) and in spring. It burns off by 8–9am. On mist mornings, the mount appears to float above the haze — an extraordinary effect that no midday visit can replicate.
Golden hour before sunset is the second premium window. The mount faces west-southwest — the sun falls directly on the abbey in the late afternoon, lighting the stone warm gold. The bay to the south and west reflects this light across the tidal flats or open water. From approximately 2 hours before sunset, the quality of light on the mount is exceptional.
Midday light is flat and harsh: The abbey faces west; noon light from the south gives no modelling to the stone and flattens all architectural detail. This is the worst time for exterior photography of the mount, and it coincides with the highest crowd density.
Night photography requires a tripod. The illumination system activates at dusk and is fully operational from approximately 21:30 in summer. Long-exposure shots (5–30 seconds) from the dam or footbridge produce the definitive night image: the illuminated mount reflected in still water or tidal pools, with streaked clouds or a clear star field above.
The Tide and Photography
High tide (coefficient above 90): The water surrounds the island and the “floating mount” shot becomes possible. The highest visual impact requires a coefficient above 100, where the water reaches the base of the ramparts. Check the tide calendar for 2026 — the highest tides are 14 March (coef 119, ~14:47), 29 March (coef 115), and 13 September (coef 118, ~15:15). Daytime high tides in the 110–119 range are the definitive photography events.
Low tide: The bay floor is exposed — vast, flat, and layered with the tracks of tidal channels and rivulets. At low tide, reflective tidal pools form around the base of the mount, creating mirror reflections. The mount surrounded by glistening wet sand rather than water has a different but equally compelling quality.
The tidal bore: During spring tides, the incoming bore — a rushing wave front — advances across the bay at speed. Photographing the bore requires positioning on the footbridge or south ramparts approximately 2 hours before high tide, with a telephoto lens. The bore is a linear feature moving fast across a flat field — a wide-angle shot will not capture it effectively.
The mount’s shadow: From the west terrace of the abbey (included with entry), early morning or late afternoon light casts the shadow of the mount itself across the bay floor. This is one of the more unusual shots from inside the site — the shadow stretches away from the rock with the tidal landscape beyond.
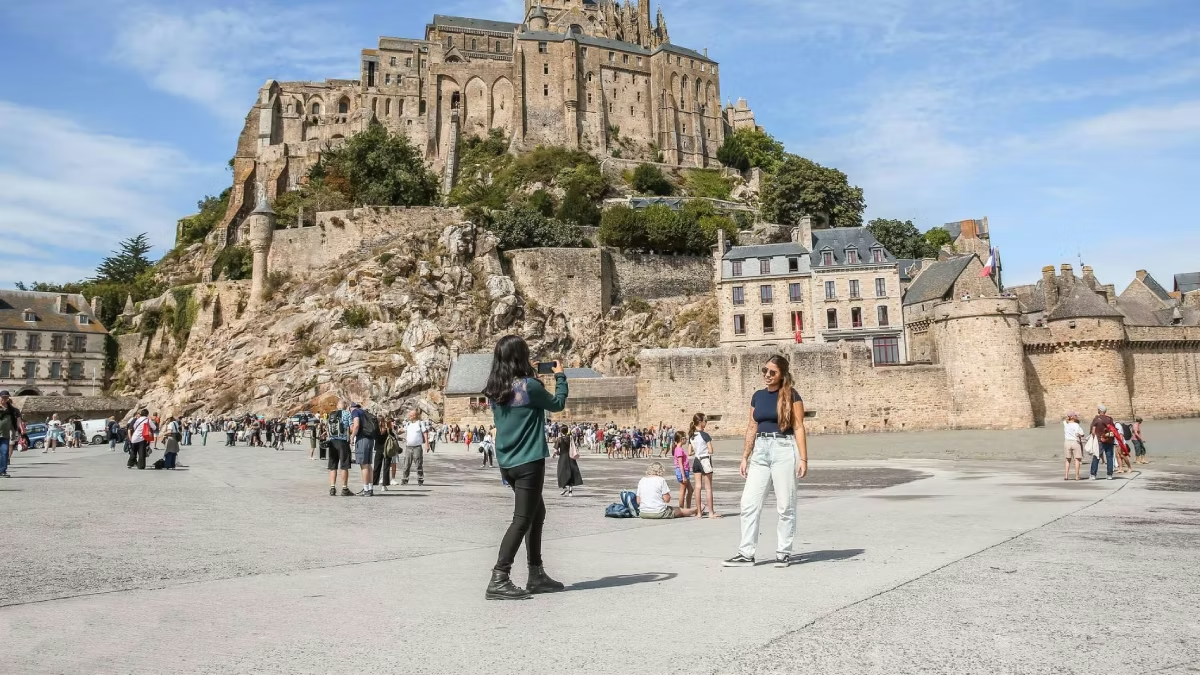
Best Viewpoints: Close Range
The Footbridge Dam (Couesnon Barrage)
The most accessible close-range viewpoint and the one that produces the most distinctive images for most visitors. From the car park or La Caserne, walk to the left of the main footbridge approach and follow the path along the Couesnon River to the dam structure. This positions you close to the mount with a slightly elevated viewpoint and the river channel in the foreground.
At high tide, the water fills the channel and the mount is reflected in the river surface — the classic close-range reflection shot. At low tide, the river channel creates a leading line to the mount from the dam position. At night, this is the best position for long-exposure illumination photography.
The Footbridge (Leaving the Island)
Standing on the footbridge as you walk away from the island, with the mount receding behind you — this is the most dramatic close-range composition. The wide footbridge acts as a leading line, the mount sits centre-frame, and the bay opens on both sides. Best in the late afternoon when the sun falls from the west and lights the abbey face directly.
The Island Entrance Esplanade
The flat area immediately in front of the King’s Gate, at the base of the mount. This position is so close that capturing the full mount requires a very wide-angle lens (14–24mm equivalent). Better for architectural detail and rampart studies than for full-mount compositions.
Inside the Abbey: The West Terrace
The panoramic viewpoint from the abbey’s west terrace — included with your entry ticket — faces the open bay. Early morning light, the view of the causeway and mainland, and occasionally the mount’s own shadow on the sand. Also the best position for watching and photographing the incoming tide from above.
The South Ramparts
From the elevated rampart walkway on the south and east sides of the island, you look down onto the bay below the walls. At high tide, the water laps directly at the base of the ramparts. At low tide, the exposed sand stretches to the horizon. The ramparts themselves — crenellations, towers, and flagged walls — provide strong foreground framing for bay shots.
Best Viewpoints: Distance Shots
Roche Torin (Courtils village)
Approximately 8km from the mount by road — a small elevation on the mainland that gives one of the finest mid-distance views of the full mount and bay. The slightly raised position (unlike the flat bay approach) allows the mount to be seen against the sky rather than against the mainland horizon. This is the viewpoint most professional travel photographers use for the classic “floating island” shot at high tide. Best at sunrise or in the evening golden hour. Follow the D275 towards Courtils; Roche Torin is signposted from the village.
Jardin des Plantes, Avranches (23km)
The public garden at Avranches has a famous belvedere viewpoint — a slightly elevated panoramic terrace facing across the full sweep of the bay to the distant mount. At 23km, a telephoto lens (200–400mm) is required for the mount to fill the frame. The advantage here is the elevated angle and the ability to shoot the mount against sky rather than against the flat bay horizon. Late afternoon light, from the belvedere facing southwest, is excellent.
Grouin du Sud / Vains-Saint-Léonard (35km)
A headland on the far (Brittany) side of the bay, approximately 40 minutes by car. The mount is visible from this headland across the full width of the bay — a telephoto shot (300–500mm) required. The angle is from the northwest, which means the north face of the mount (less commonly photographed) is visible. Best in the morning when the sun rises behind the photographer and lights the mount from the east. The rock formations of the headland can be incorporated into the foreground at lower tide levels.
The Causeway Approach Walk
Walking the 2.5km pedestrian causeway from the car park to the island at dawn or dusk, with the mount ahead and the bay opening on both sides, is one of the more cinematic photography routes at the site. The perspective changes continuously — the mount grows in the frame over 40 minutes of walking. No specific focal length required: 24mm to 70mm covers the causeway walk well.
Inside the Island: Photography
The Grande Rue: The street is too narrow for conventional architectural photography in midday conditions. The best street shots are early morning (before 9am) when it is empty, using a moderate wide-angle (24–35mm) from the lower end of the street looking up towards the abbey staircase. The compression of stone, timber, and climbing street is strongest from this angle.
The abbey cloister: The cloister doubles of slender granite columns surrounding a rooftop garden — best in morning light when the sun enters from the east and the columns cast regular shadows across the pale stone floor. A 16–24mm wide-angle captures the full depth of the arcade.
The abbey church: Interior church photography is allowed (no flash). The Romanesque nave, Flamboyant Gothic choir, and the light quality in each section reward a wide-angle lens and careful exposure for the contrast between lit windows and dark stone.
Equipment Recommendations
A tripod is essential for night photography: The illumination shots require exposures of 5–30 seconds for sharp, noiseless results. A lightweight travel tripod (carbon fibre) is manageable for a day visit.
A polarising filter reduces glare from tidal reflections and saturates the colour of the stone and sky during midday conditions. Useful for bay reflection shots.
Focal length range: A 24–200mm equivalent covers 90% of shots at the site. Wide-angle for the cloister and street shots; 70–200mm for the bay and tidal bore from the ramparts; 300mm+ for the distance shots from Roche Torin and Grouin du Sud.
Weather: Do not write off overcast days. Soft, diffuse light on the abbey stone and dramatic cloud formations over the bay produce compelling images. The storm light on the mount — dark sky, illuminated stone — is among the most powerful photography conditions possible here.
Seasonal Photography Notes
Late summer (August–September): The best overall photography season. Long days, morning mist most likely, high-coefficient tides on the September equinox, the Nocturnes still running, and the angle of sunrise light at its most flattering for the east-facing mount.
Spring (March–May): The equinox spring tides in March bring the highest coefficients of the year. Daylight hours are shorter, but the low-angle light of late winter is dramatic on the stone. Fewer crowds means a cleaner frame.
Winter: Cold, potentially wet, but extraordinary for atmospheric photography. The winter light on the mount is dramatic; the bare bay landscape has a severity that summer softens. Very few people in frame. A weatherproof camera body or cover is advisable.
Frequently Asked Questions
What is the best time of day to photograph Mont-Saint-Michel?
Golden hour before sunset (the mount faces west) or sunrise for the early mist. Avoid midday.
What tide is best for photography?
High tide (coefficient above 90) for the water-surrounded island shot; check the 2026 tide calendar for the best daytime high tides. Low tide for reflection pools and exposed bay floor compositions.
Do I need a tripod?
Essential for night photography. Useful for low-light dawn shots. Not required for daytime photography.
Can I photograph inside the abbey?
Yes — photography inside the abbey is permitted (no flash). Tripods may be restricted in some areas; check on arrival.
What is the best distance viewpoint?
Roche Torin (8km, accessible by car) offers the best accessible mid-distance view. Grouin du Sud (35km) offers the most unusual angle for photographers who want something different.